Attach PDF to Salesforce with Zapier
Use Zapier with PactSafe webhooks to attach the PDF back to Salesforce.
By using Ironclad Clickwrap webhooks in combination with Zapier, you can easily send data back to Salesforce as needed.
Upgraded Zapier Plan NeededZapier may require a "Premium" or upgraded plan in order to use their provided Salesforce integration and Zapier webhooks. Want PactSafe to support this natively? Send us feedback at https://contribute.pactsafe.com/tabs/14-planned/submit-idea.
Once you have your Zapier account set up and with a plan that supports the Salesforce integration, follow the steps below to get started.
Connect Zapier to Salesforce
Make sure that you have gone through the process of connecting your Salesforce instance with Zapier. Zapier provides some information on how to get started in their docs.
Get Your REST API Access Token from PactSafe
Information on getting your access token can be found here in our docs. Keep your access token handy and in a safe place as we move on in this process.
Create a new Zap
Within Zapier, you should see an option to "Make a Zap". Click on this and you are presented with Zapier's editor and can begin adding "Tasks" to the Zap.
Name Your Zap + Add a Webhook Trigger
Go ahead and give your Zap a familiar name and then make your trigger for the Zap a webhook, which will provide you with a unique Zapier URL that you can use in combination with PactSafe webhooks.
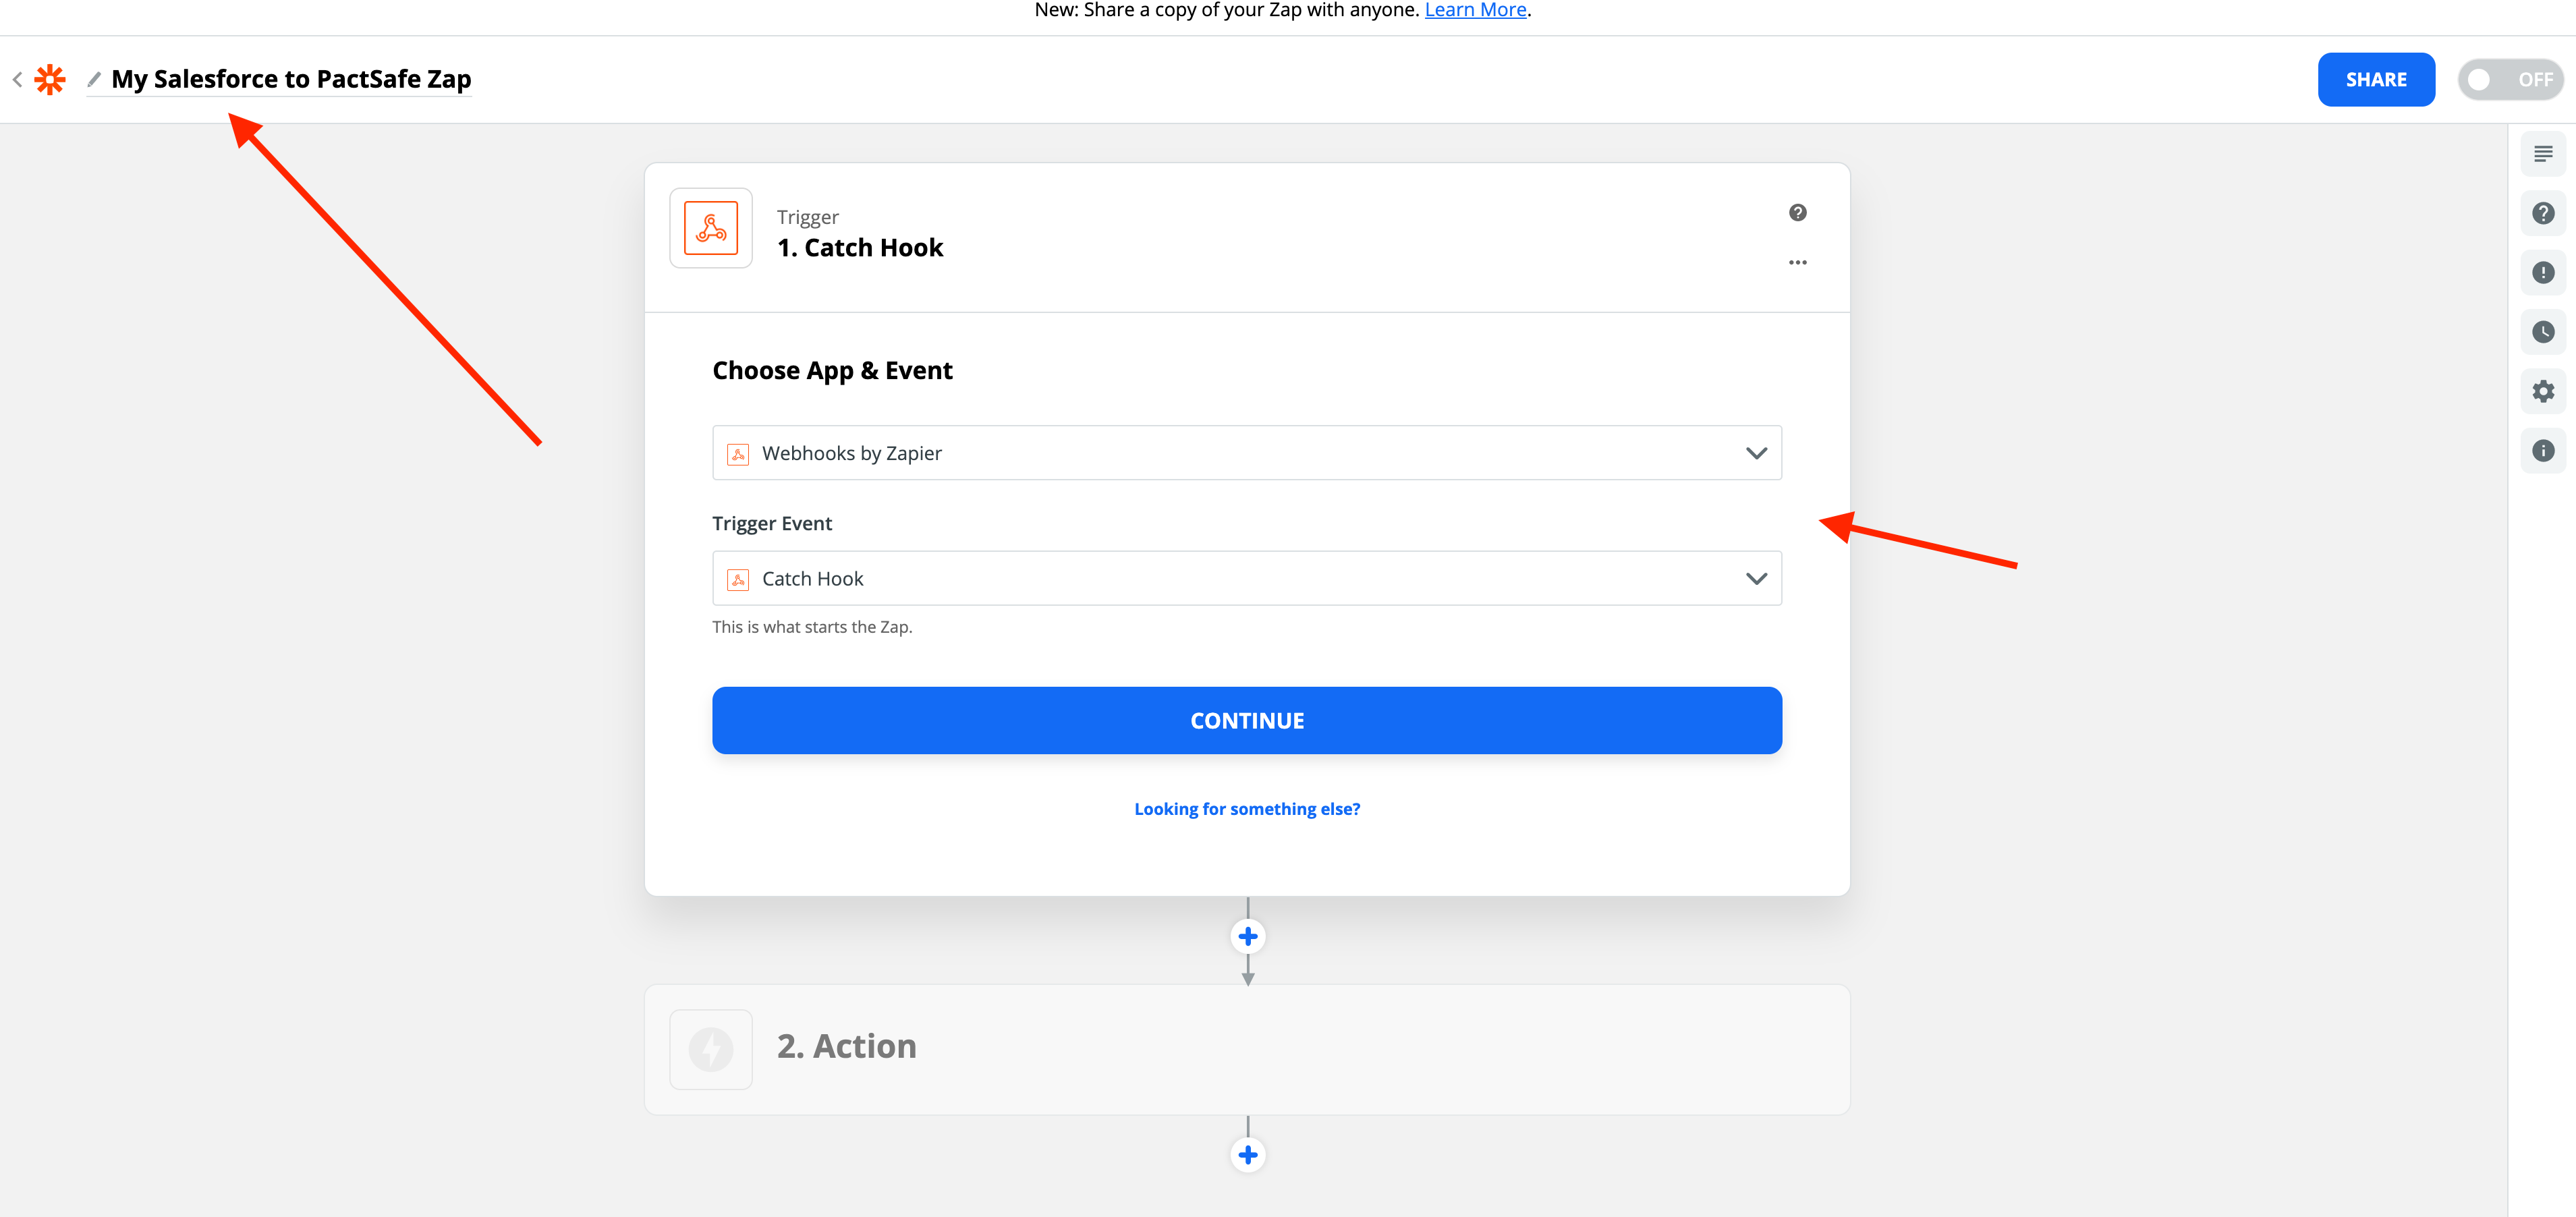
Named Zap and added a Webhook "Catch Hook" as the Zap trigger.
Set up the PactSafe Webhook Integration
Copy Zapier Webhook URL
Once you have created the trigger, copy the provided Zapier URL and head to the PactSafe Web app to configure the PactSafe webhook, which is used to initialize the Zap.
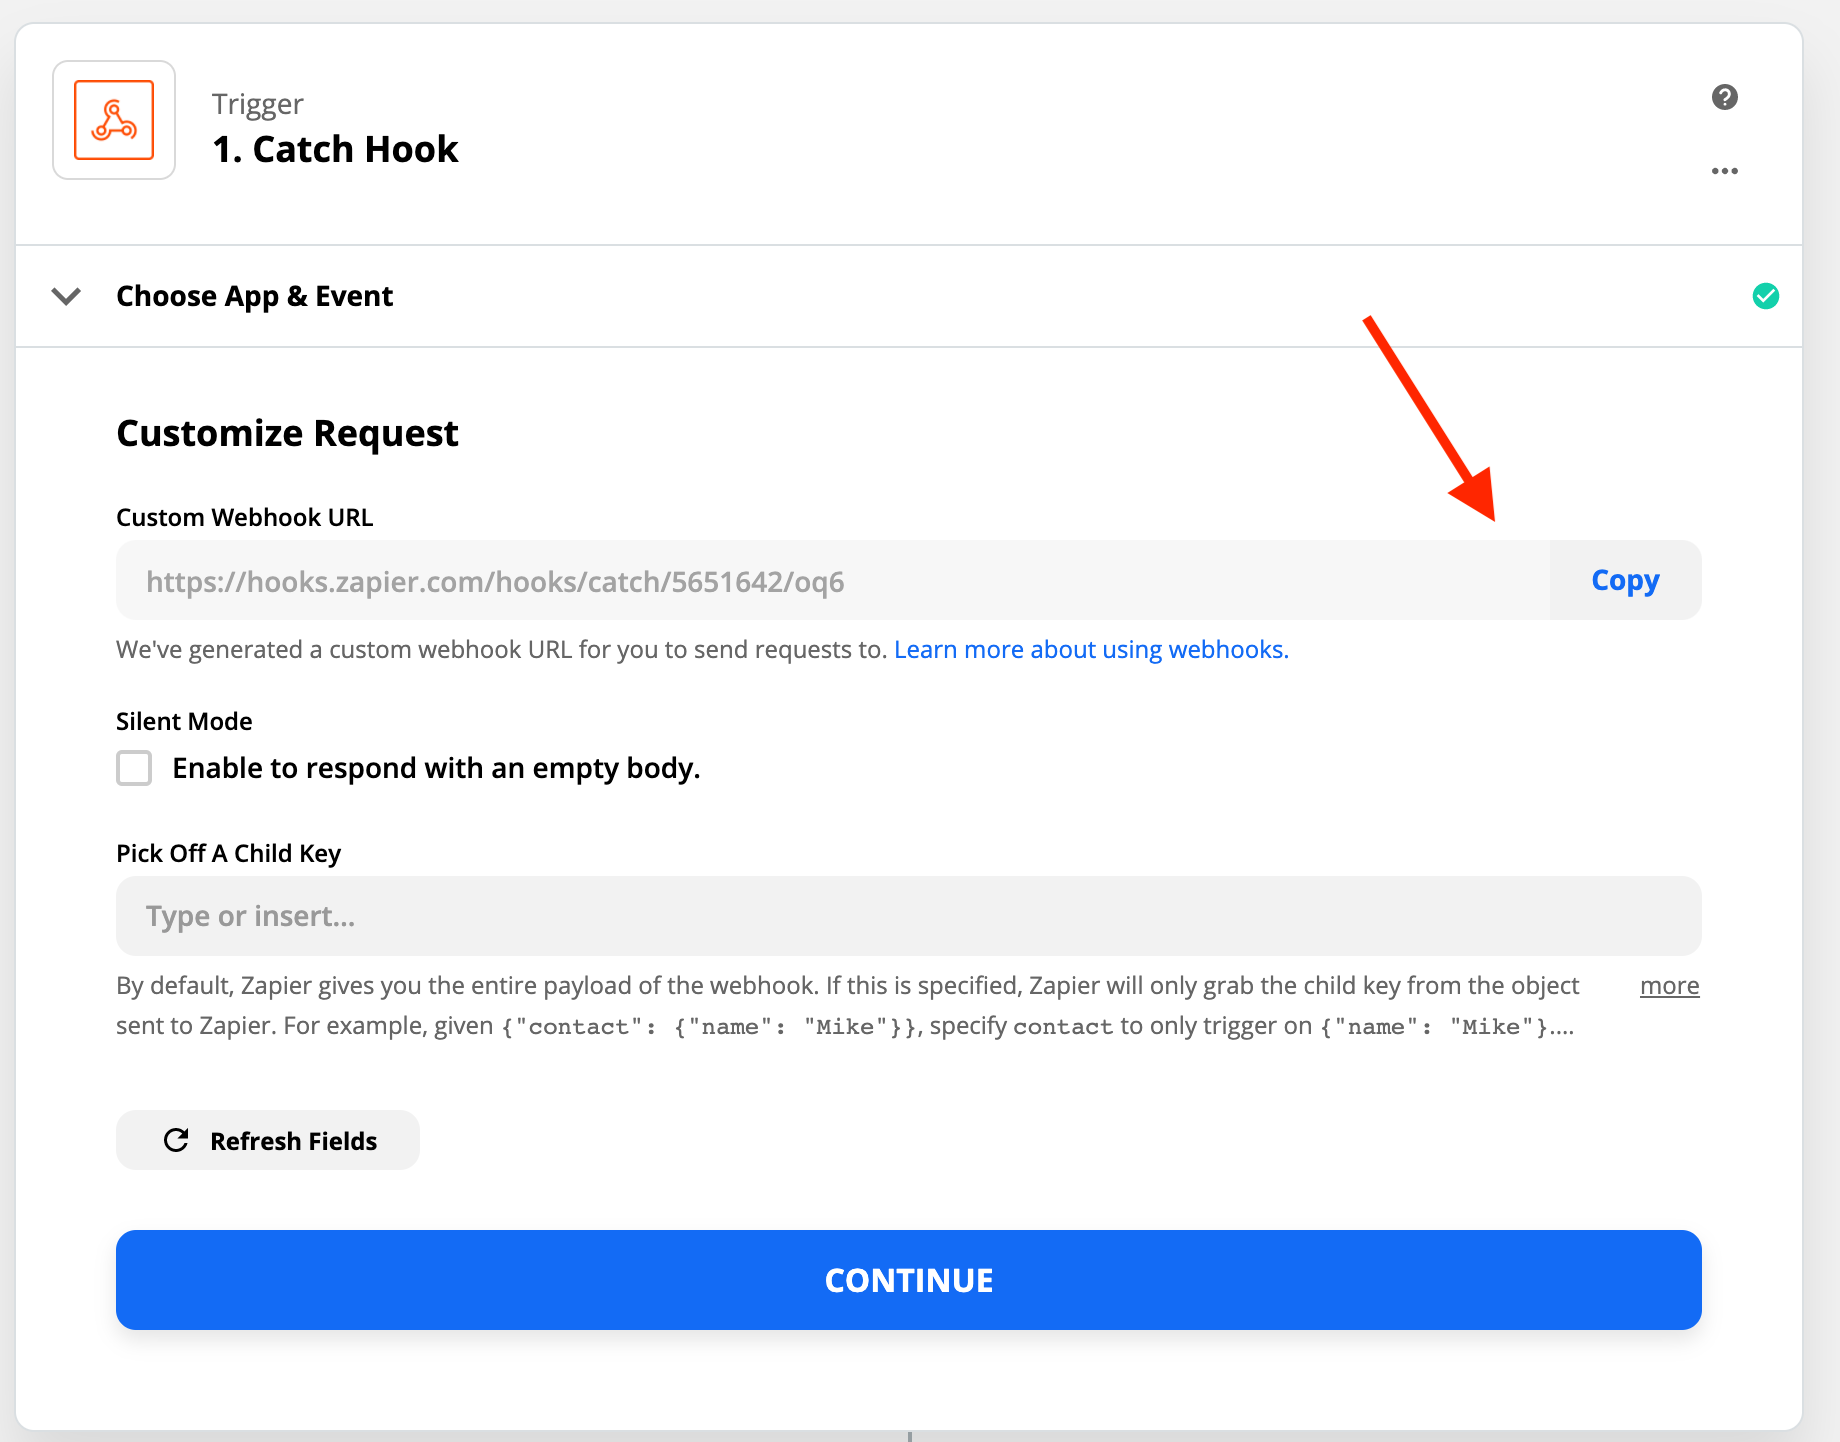
The URL provided by Zapier will be copied to PactSafe.
Add and Configure PactSafe Webhook
Go to the integrations page in the PactSafe app and add a new webhook.
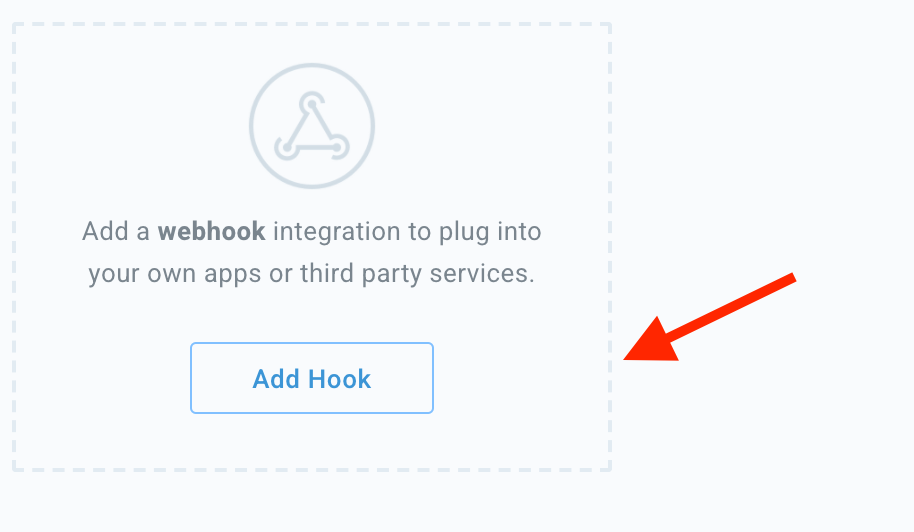
Add a new PactSafe Webhook.
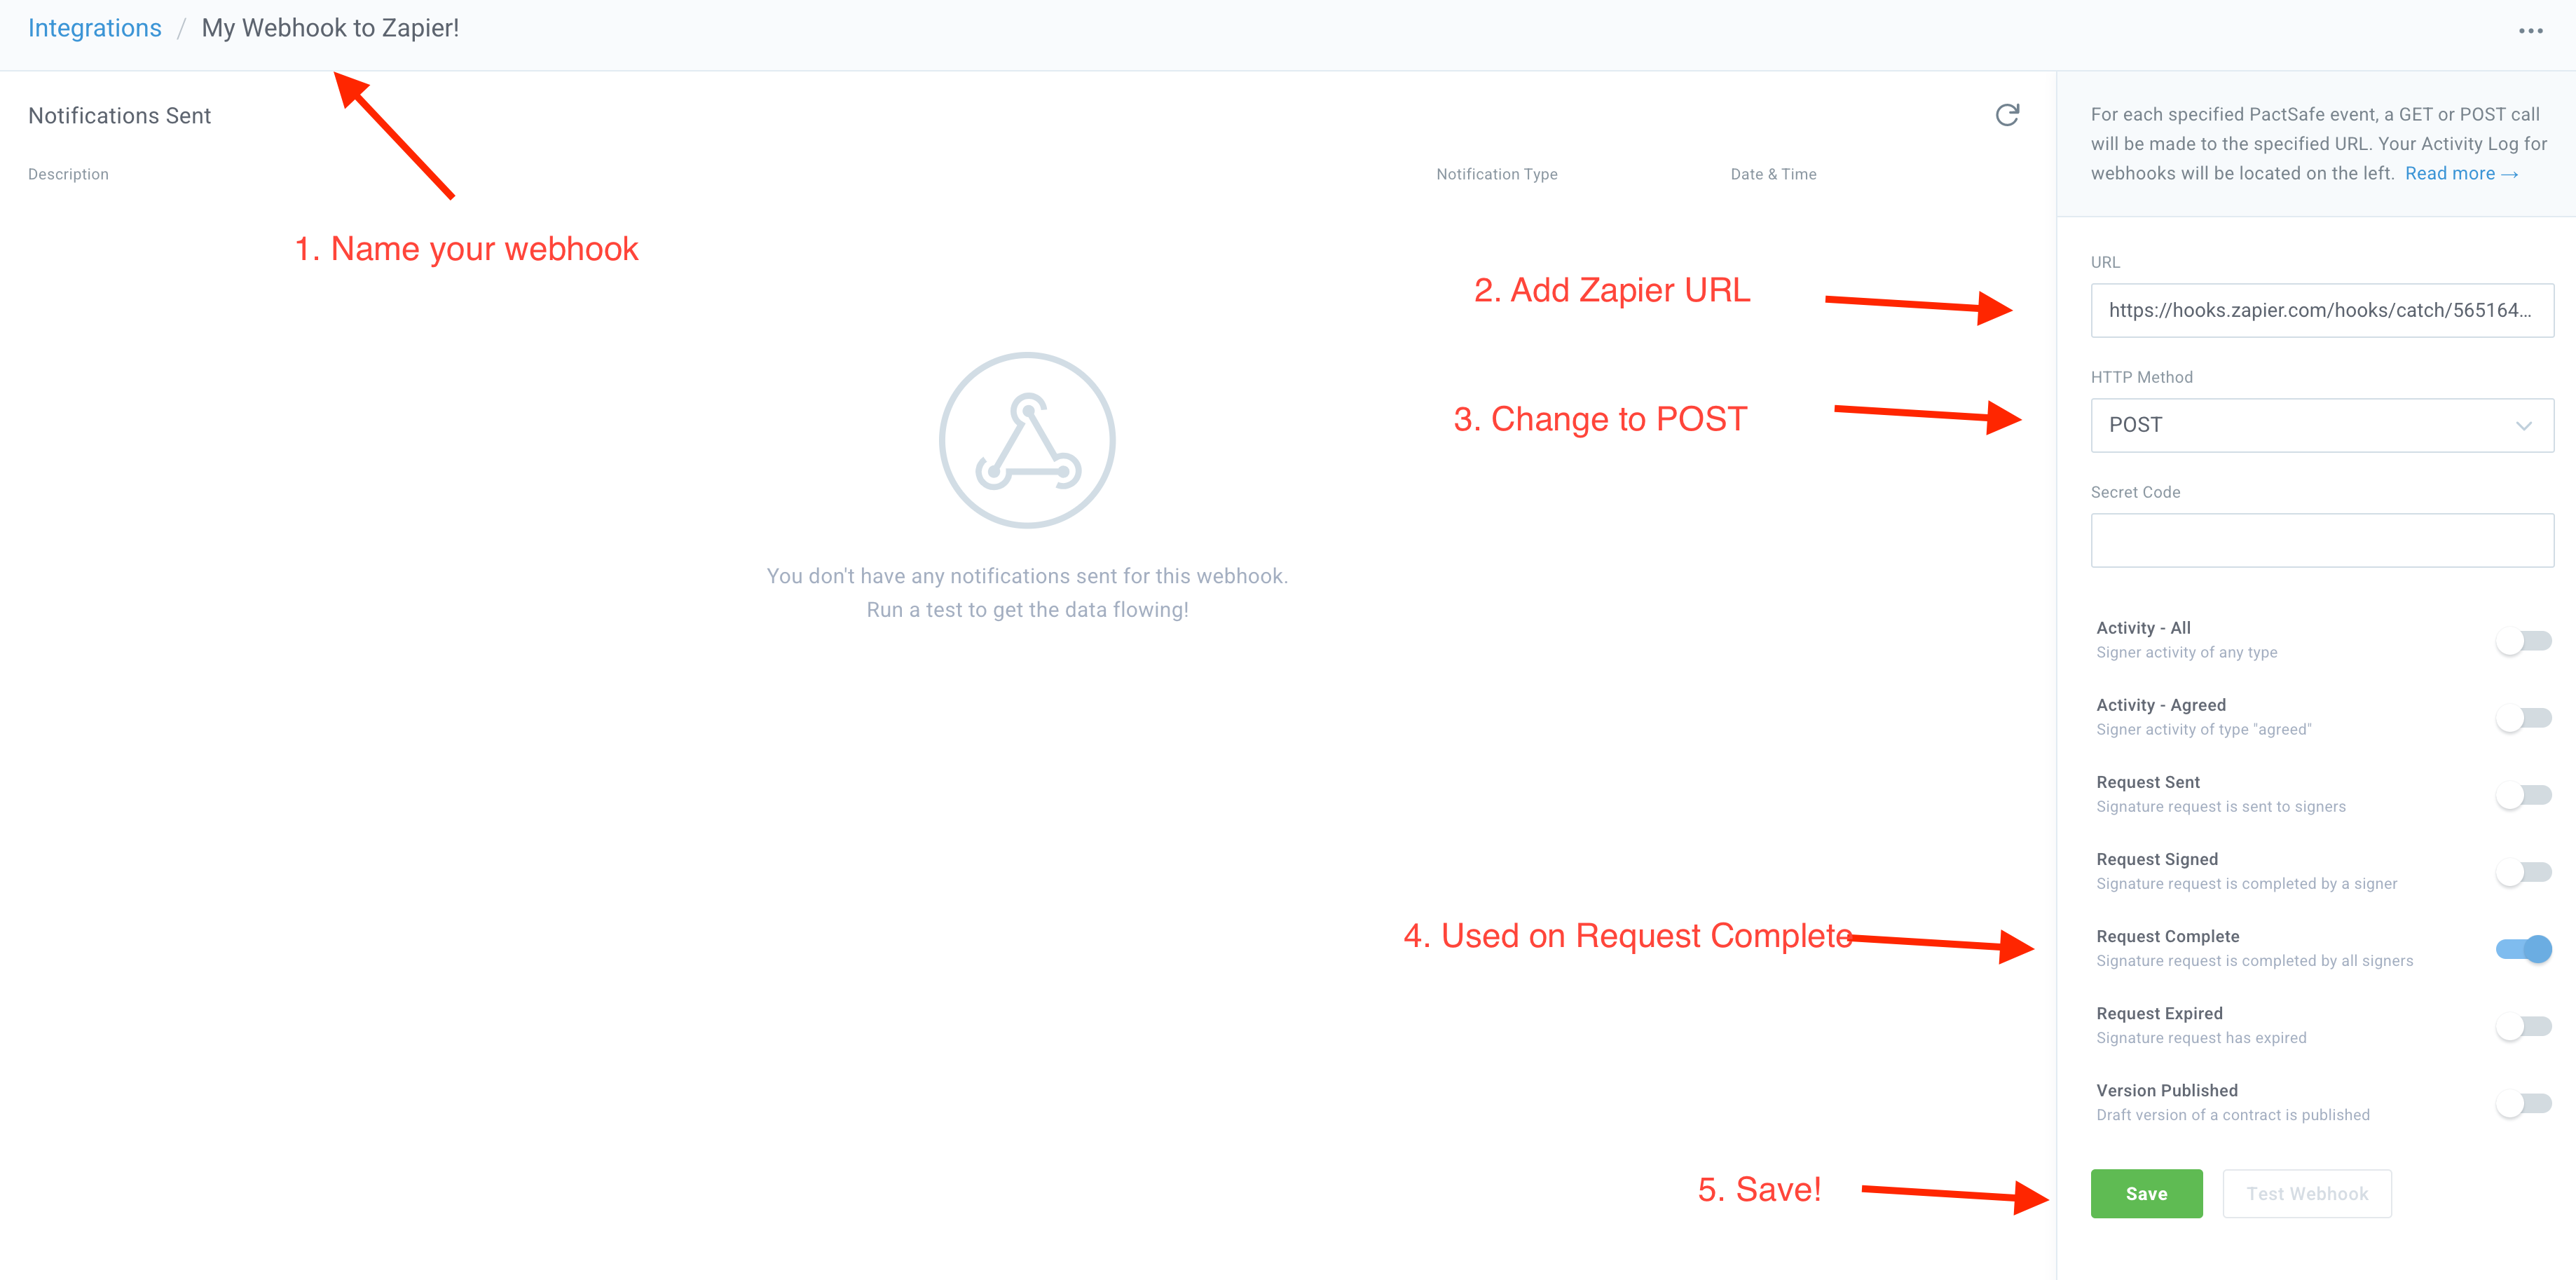
Go through the following steps:
- Name your PactSafe Webhook Integration.
- Add your Zapier URL to the URL field.
- Change the HTTP Method to POST.
- Enable the type "Request Complete".
- Save your changes!
Webhook Type: Request CompleteThis webhook type is typically best used for sending the Request PDF (acceptance record) back to Salesforce.
Complete a Test Salesforce Request
In order to get test data into Zapier (for configuring later portions of the Zap, you need to create a test PactSafe Request in Salesforce, send it to yourself, and complete it. Once you have done so, please continue moving forward to the next step.
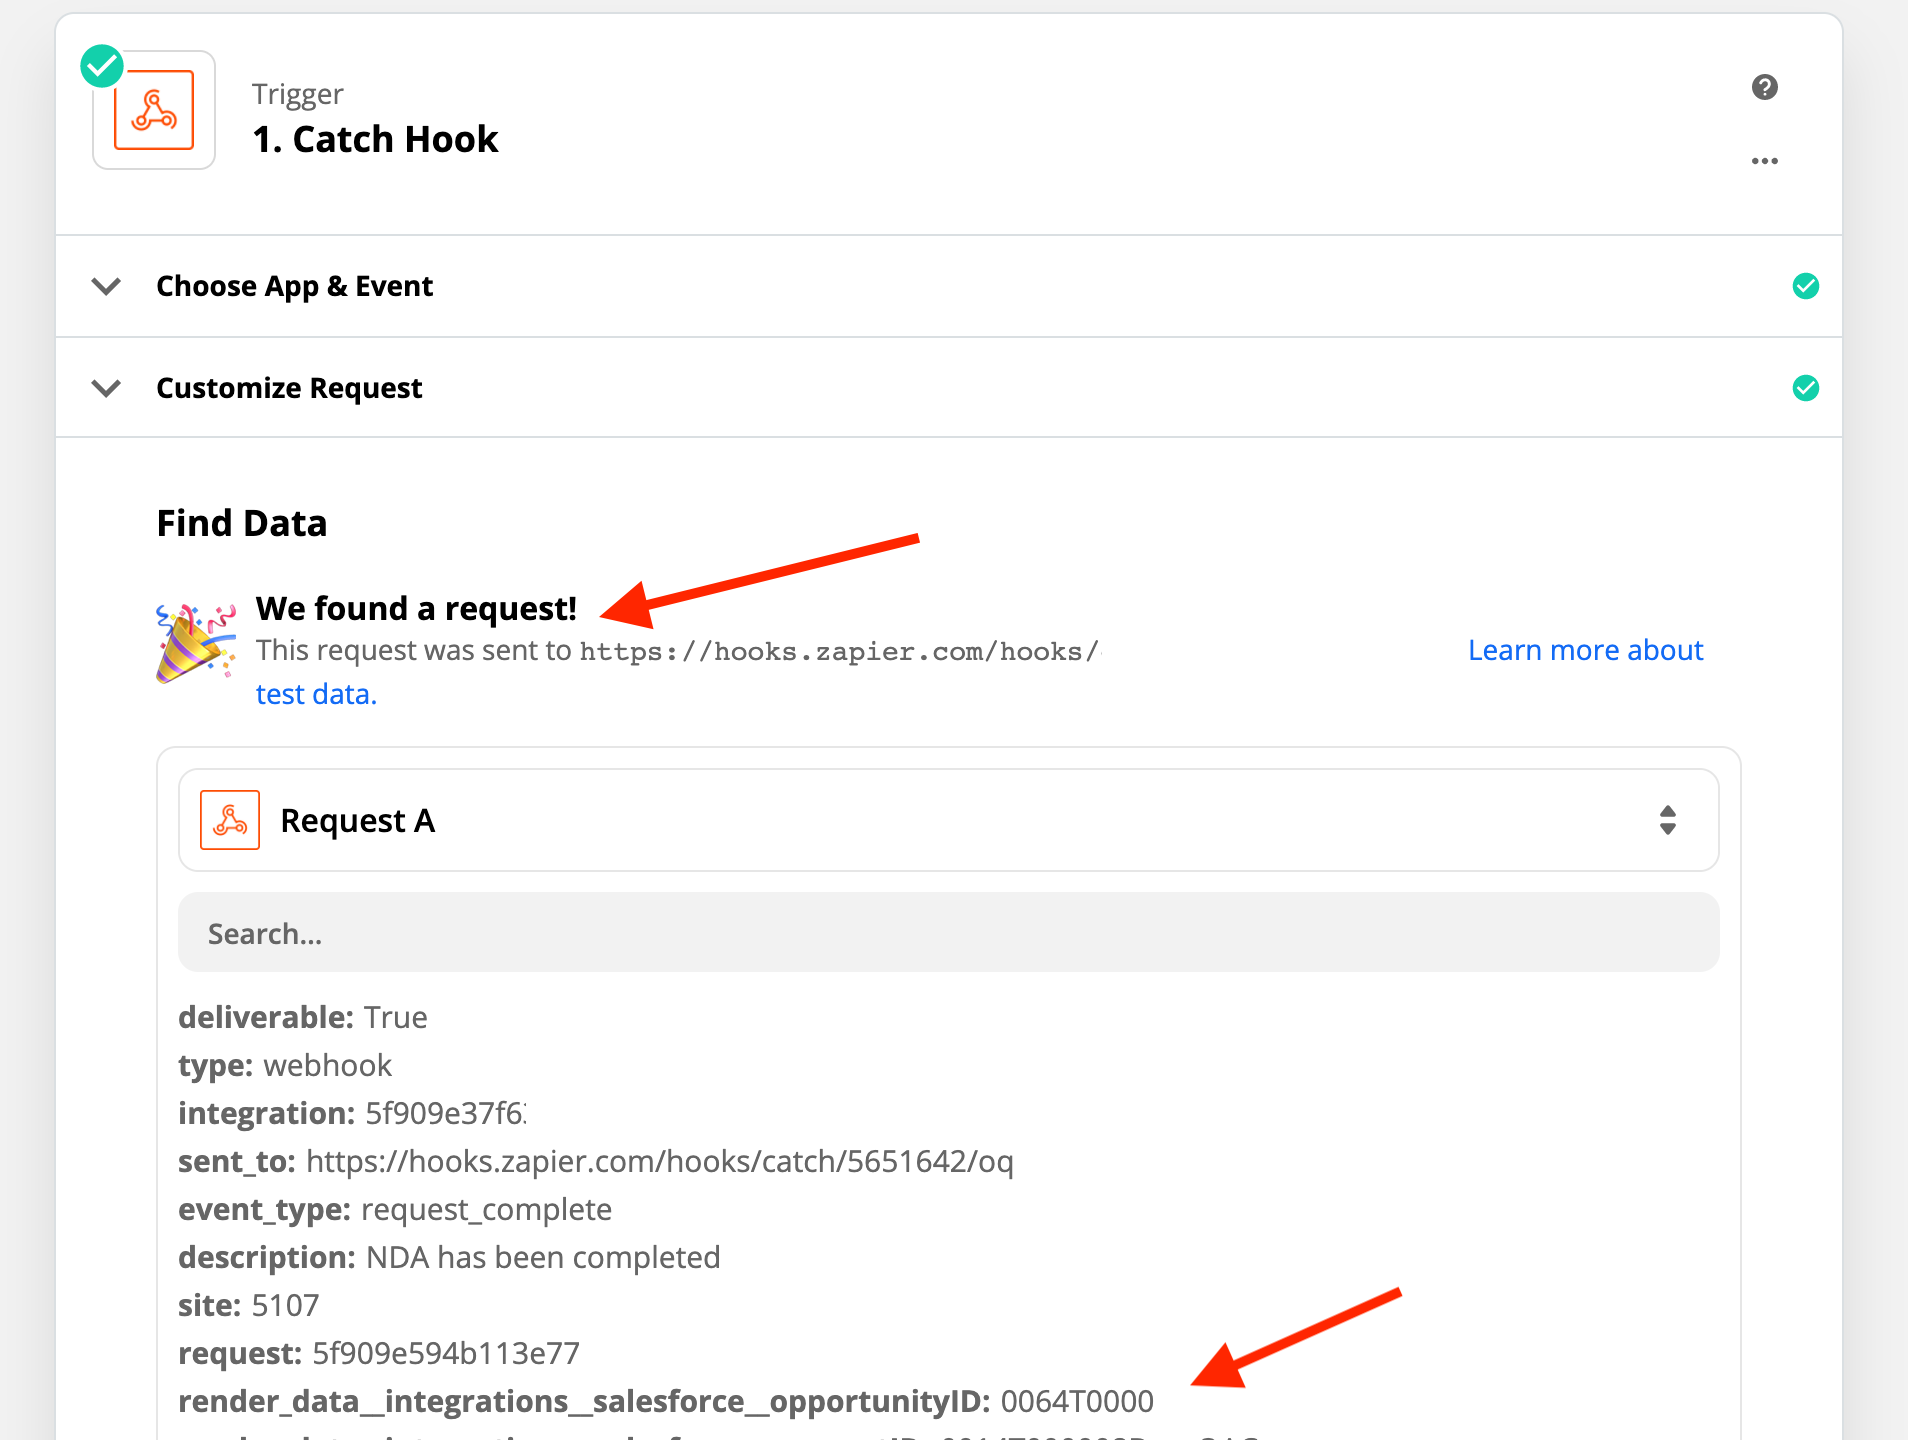
Test data found!
Add a Filter
In order to ensure that your Zap is only being used for valid PactSafe Requests (i.e. Requests with linked Salesforce data), add a Zap Filter to prevent additional steps from working unless Salesforce data exists.
For example, in the screenshot below, you'll see a filter that looks for the opportunity_id field from the webhook test data and ensures data exists.
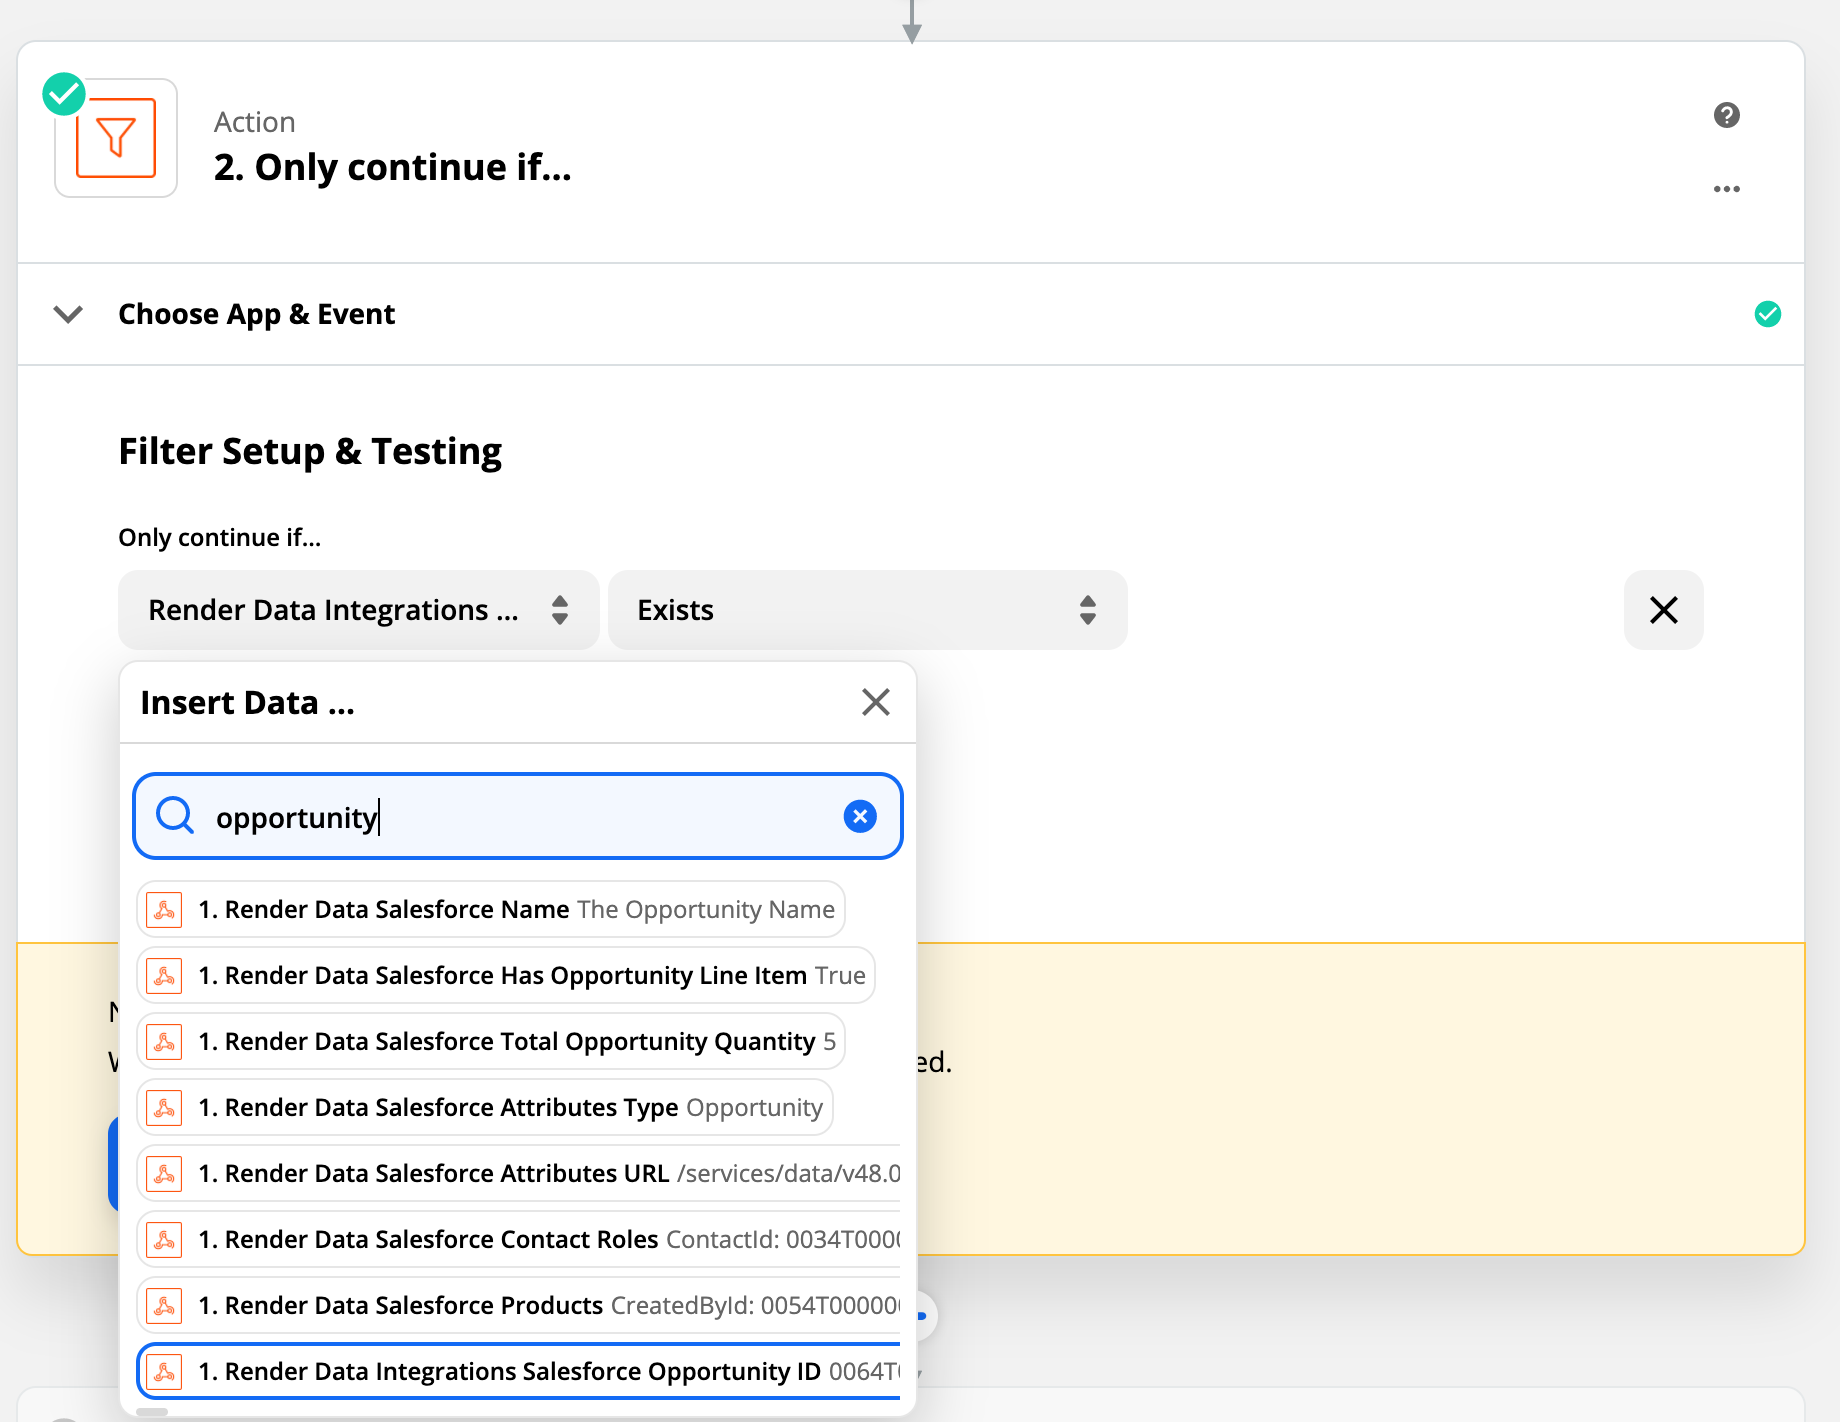
Ensure we have an opportunity id in our render data!
Add Webhook for PDF Record Step
Add a Zapier Webhook
You'll want to add another Zapier Webhook except for this time you'll be using the "Custom Request" option.
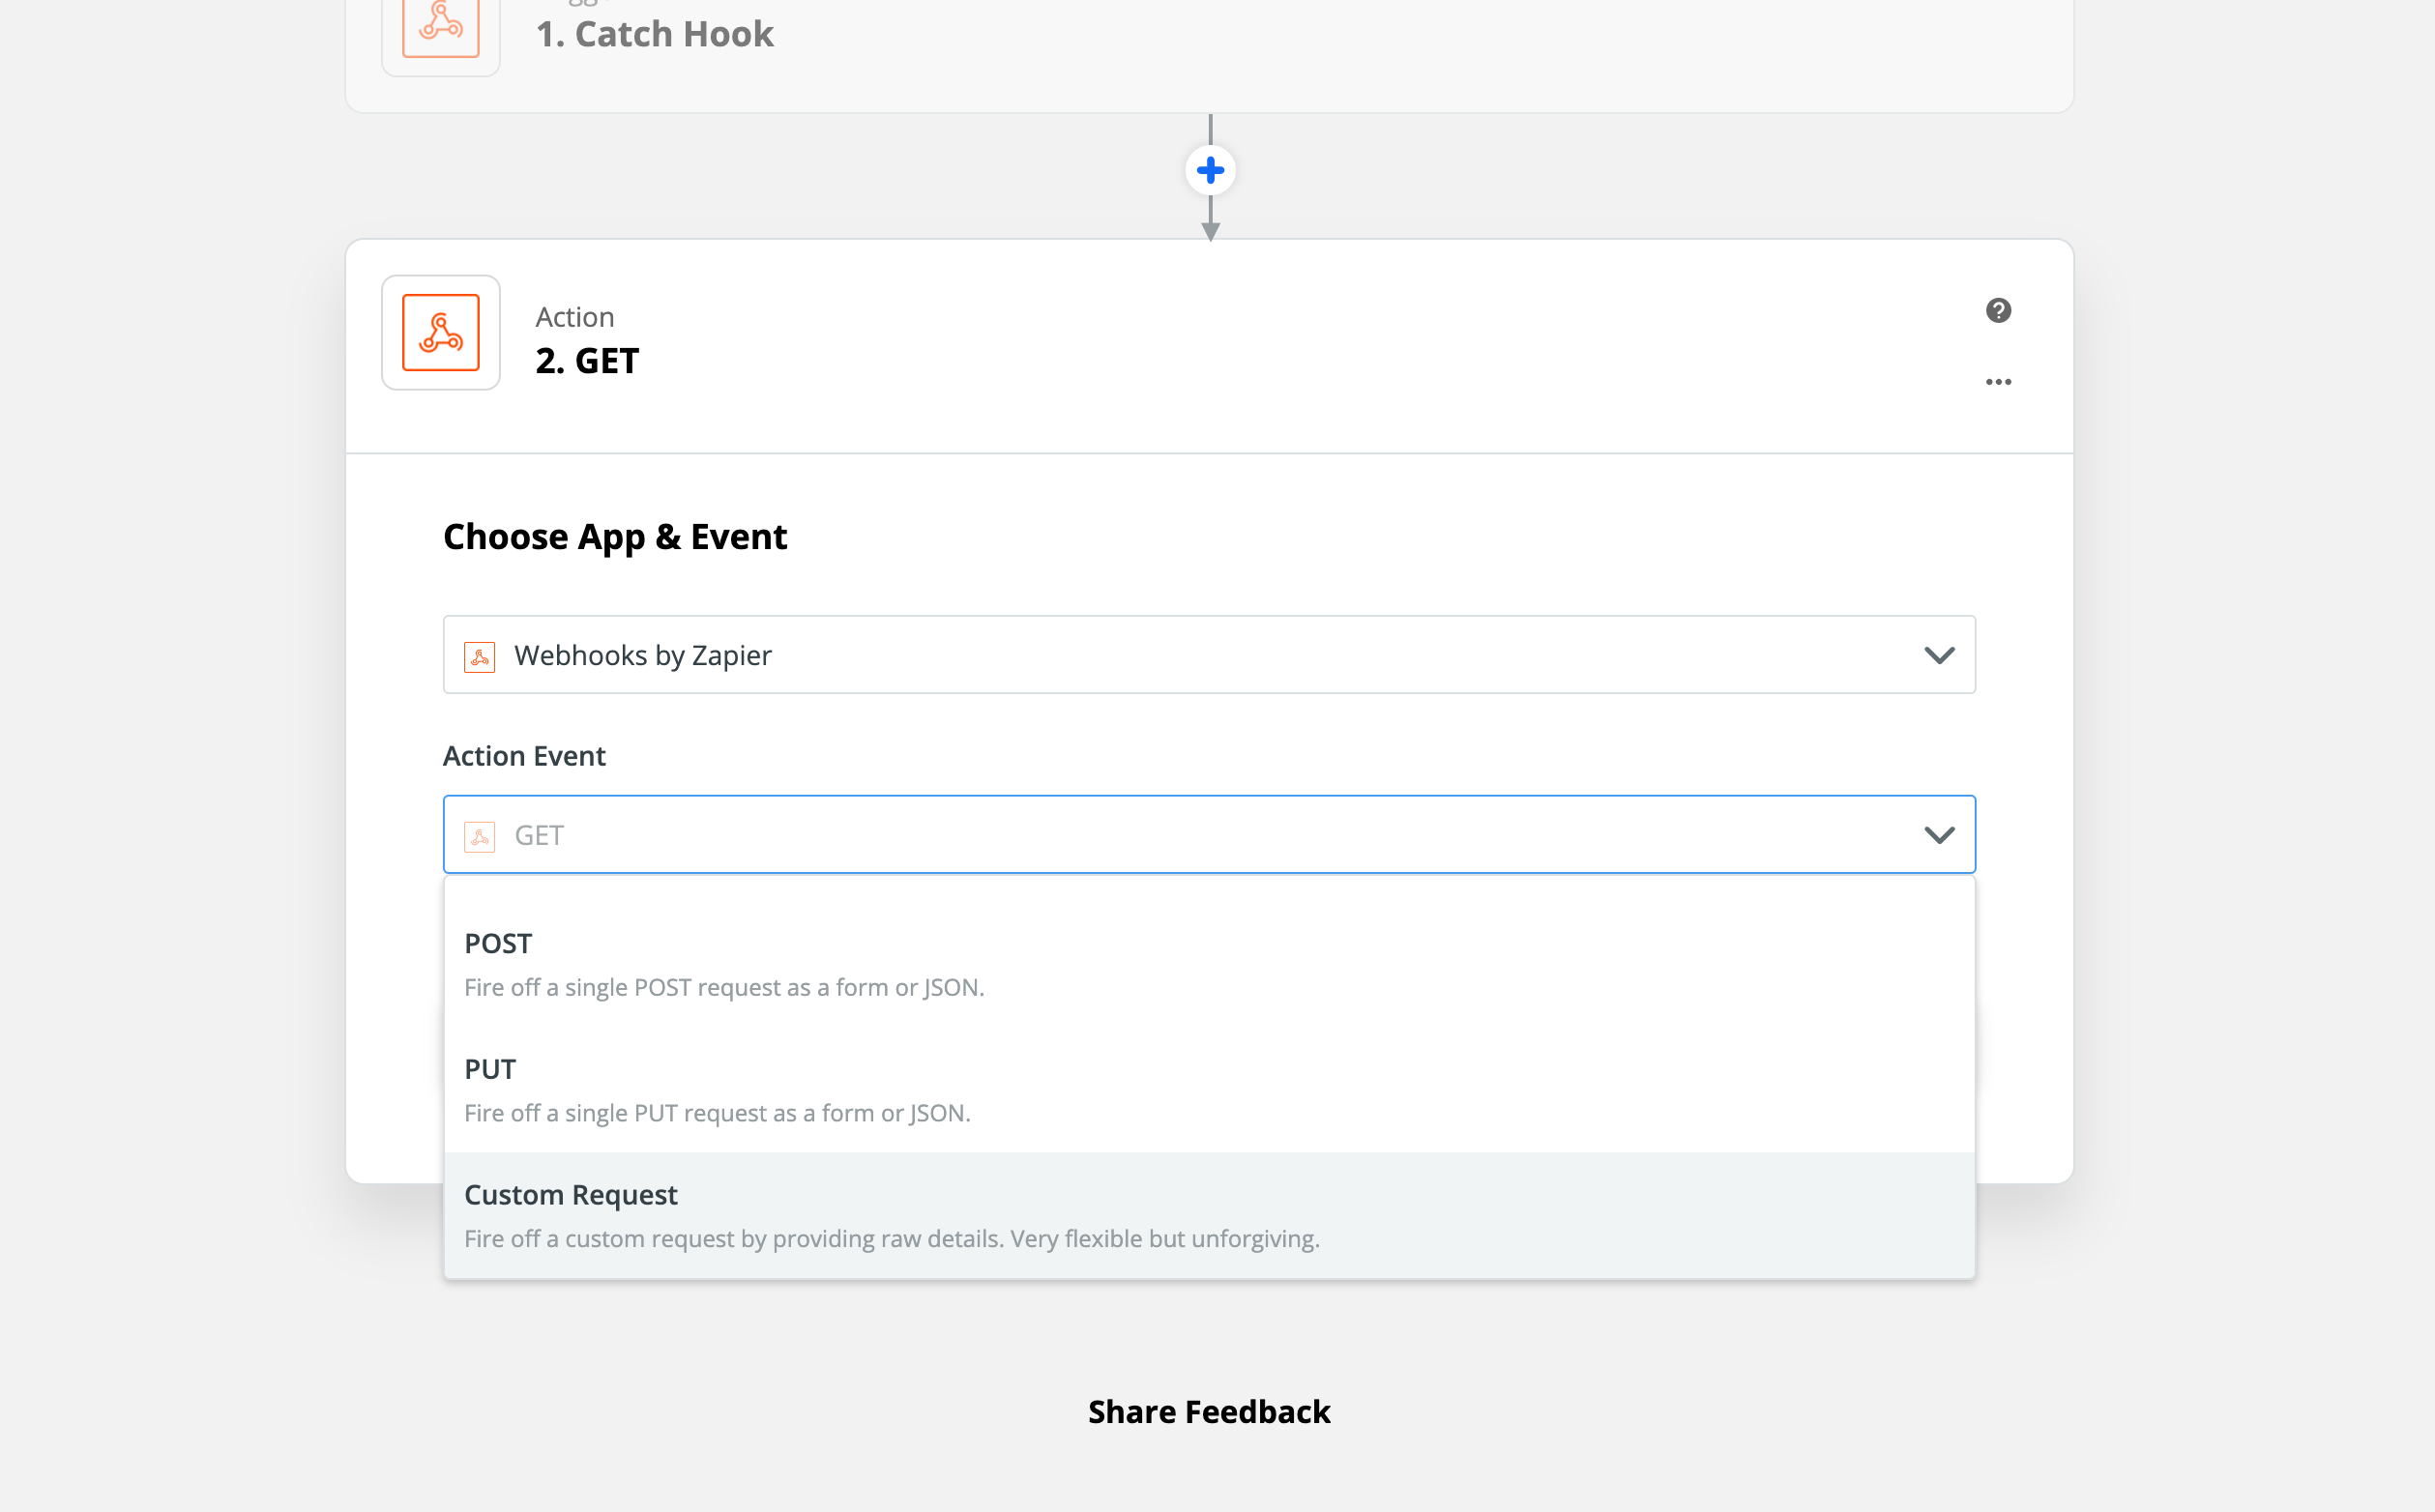
Configure the Custom Request
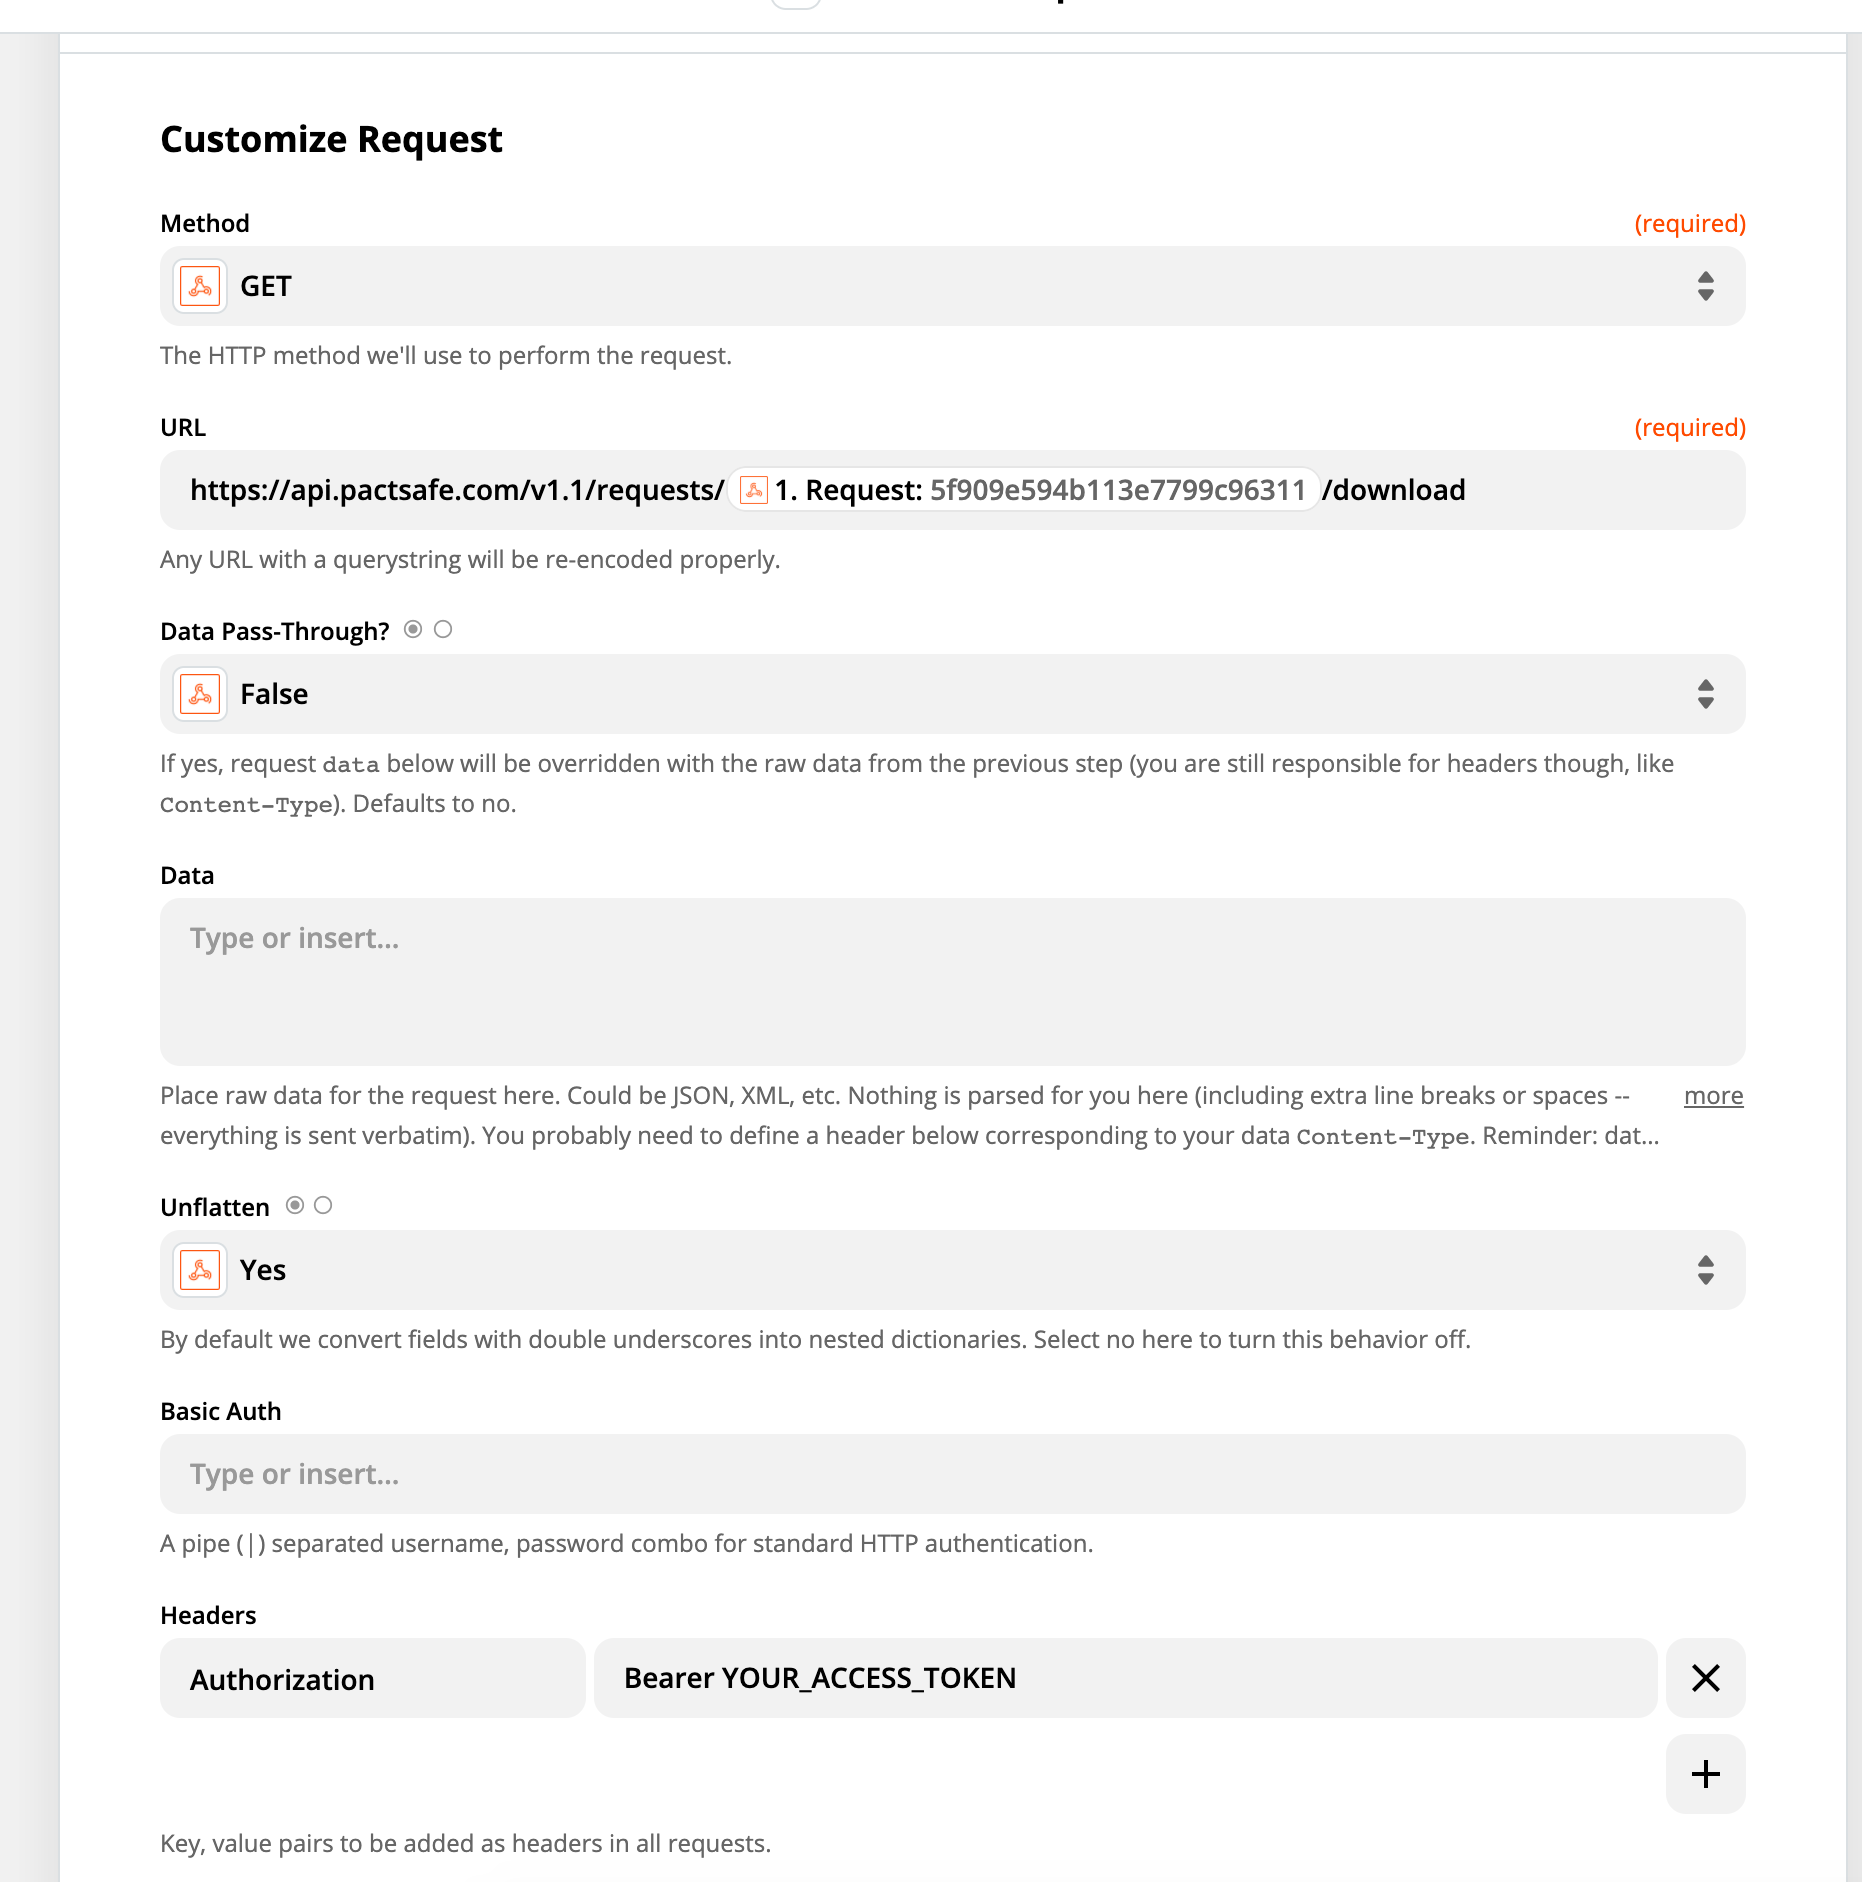
With the Custom Request option selected, continue on to configuring the Zap using the following settings:
- Method: POST
- URL:
https://api.pactsafe.com/v1.1/requests/{request}/download- You'll need to grab the value from step one and replace the above
{request}with the nameRequestfrom step 1, which Zapier will dynamically populate upon each webhook call
- You'll need to grab the value from step one and replace the above
- Add the header
Authorizationwith the valueBearer {your_access_token}- Replace the
{your_access_token}with your access token previously retrieved.
- Replace the
Add Salesforce Zapier Step
Now you are ready to add a step for updating Salesforce!
Create Attachment in Salesforce
Select Salesforce as your next step in the Zap and you'll want to select the Create Attachment in Salesforce option. This will you to take the PDF record that you just retrieved and attach it to a Salesforce object.
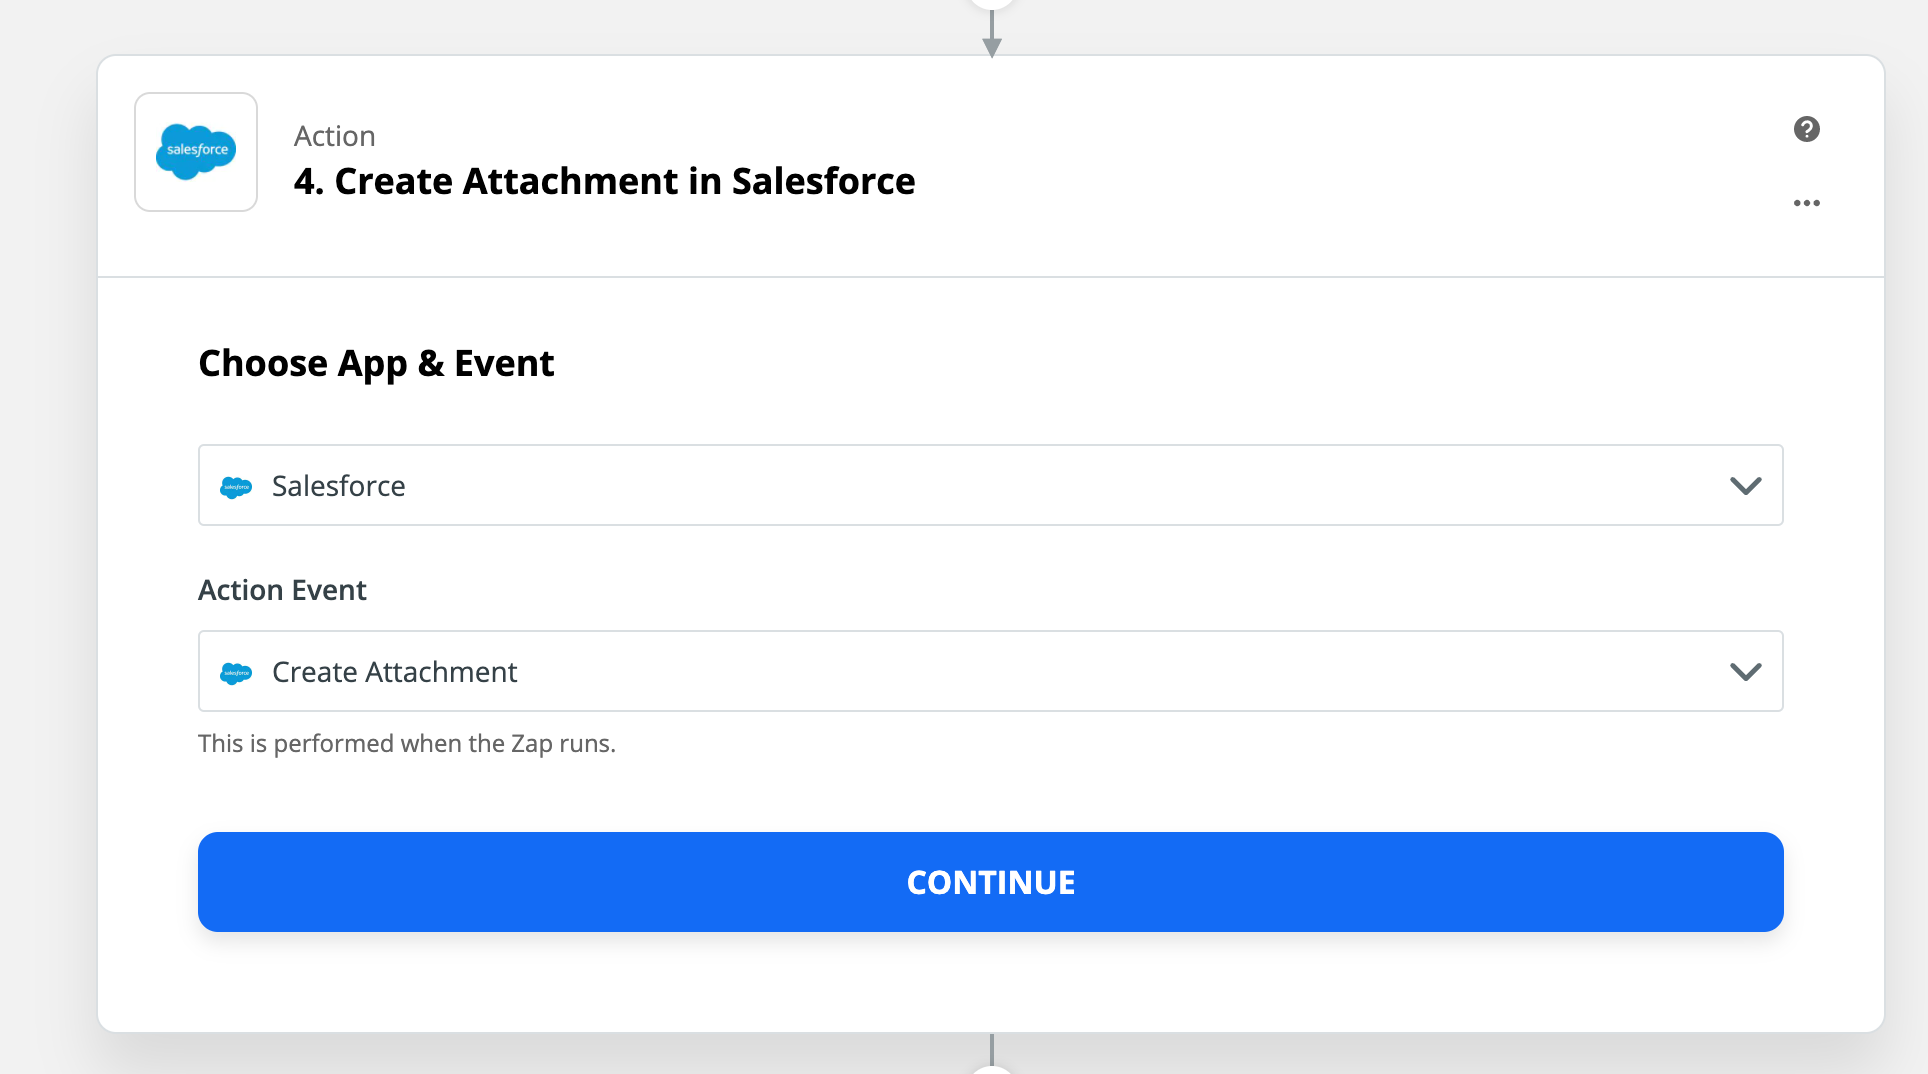
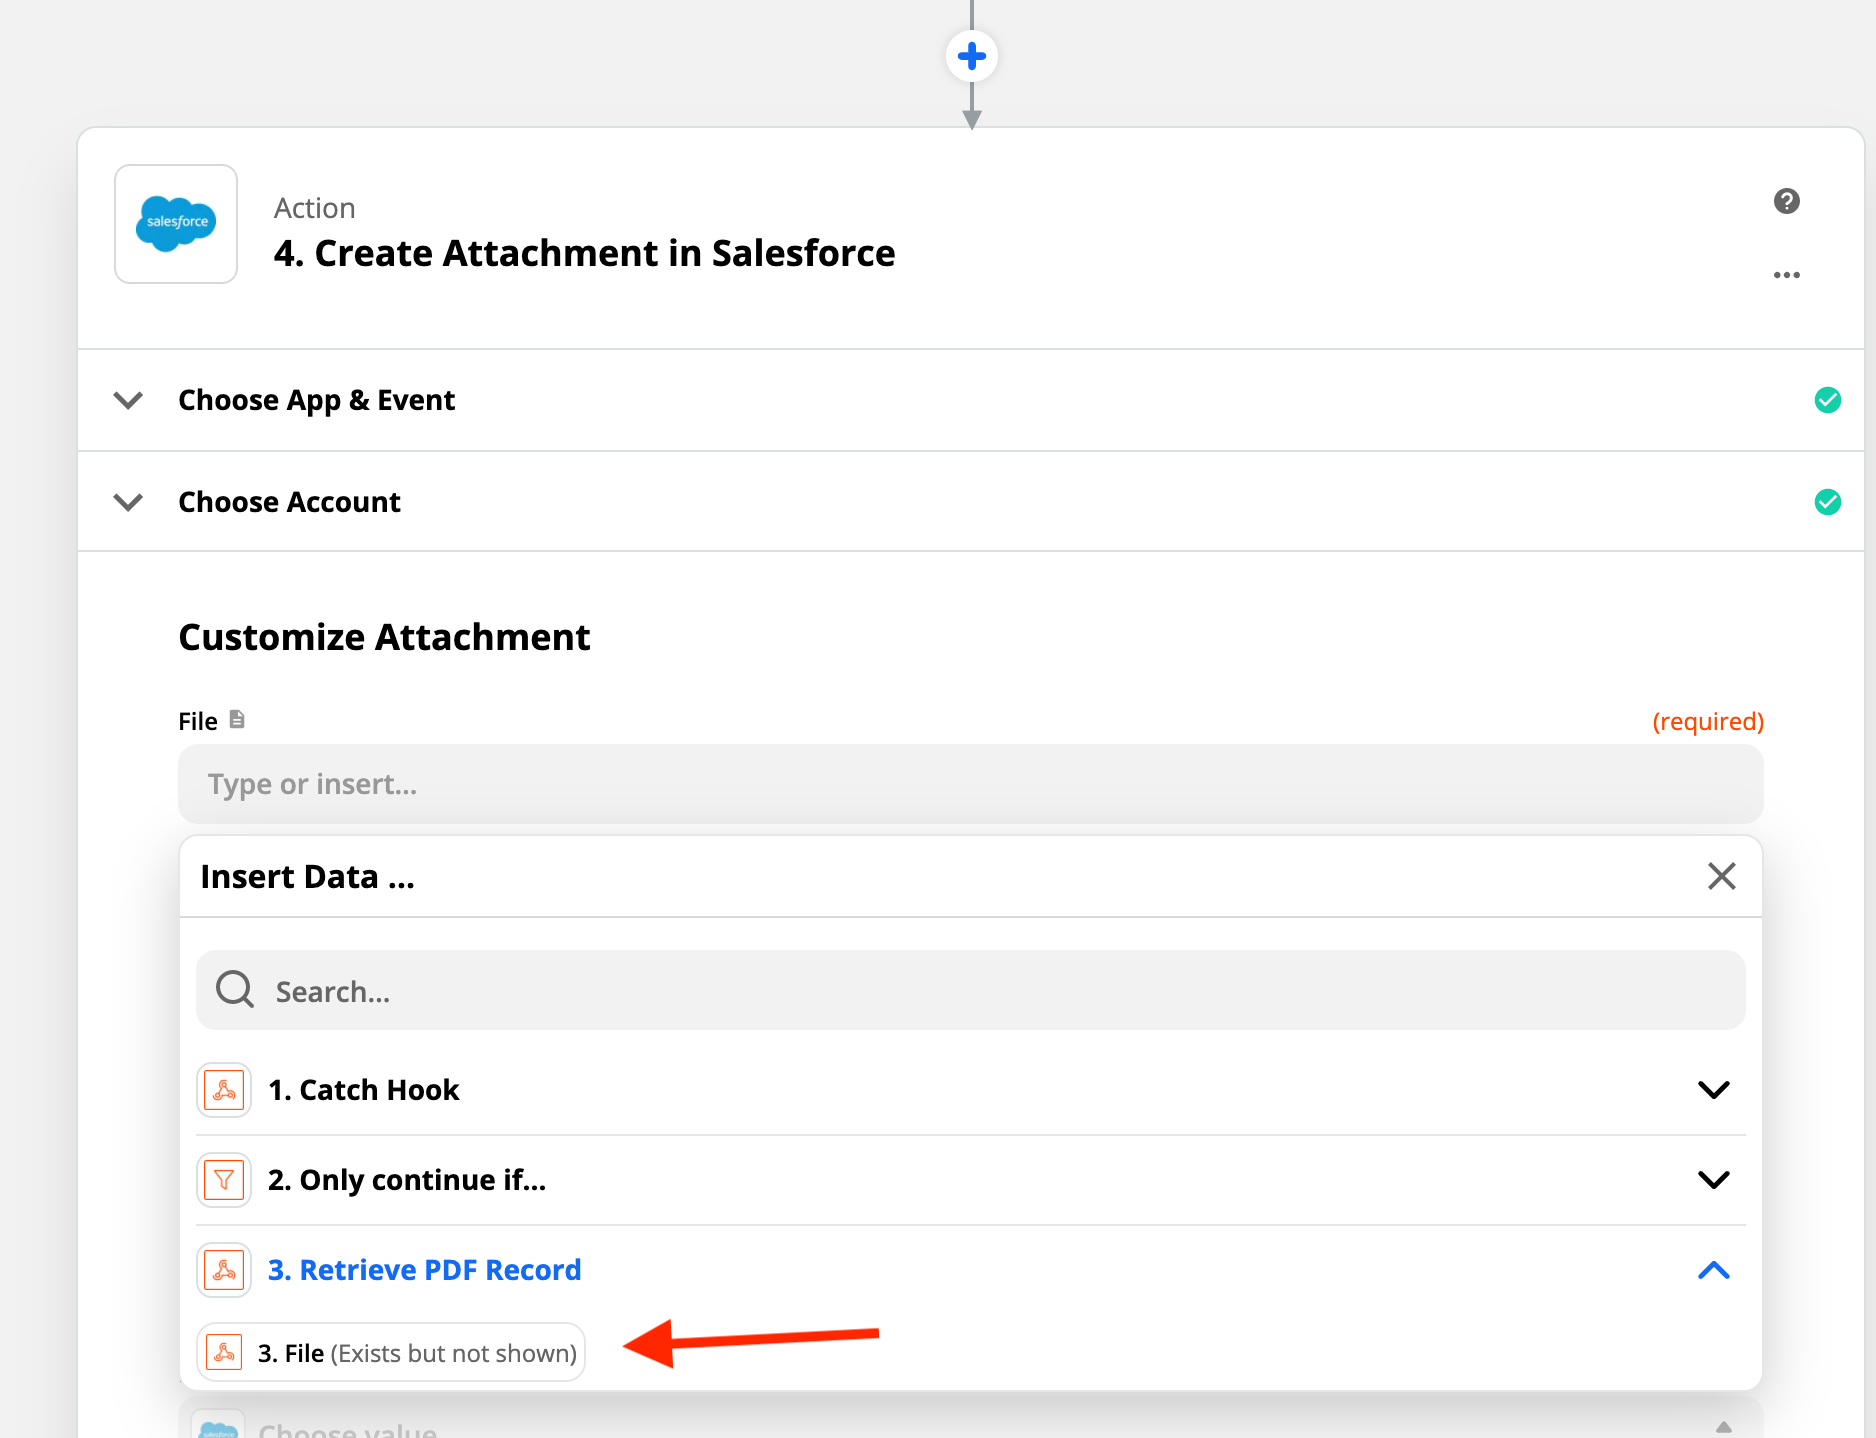
Select PDF File for Attachment
Look at the previous steps and find the PDF file retrieved from the PactSafe API.
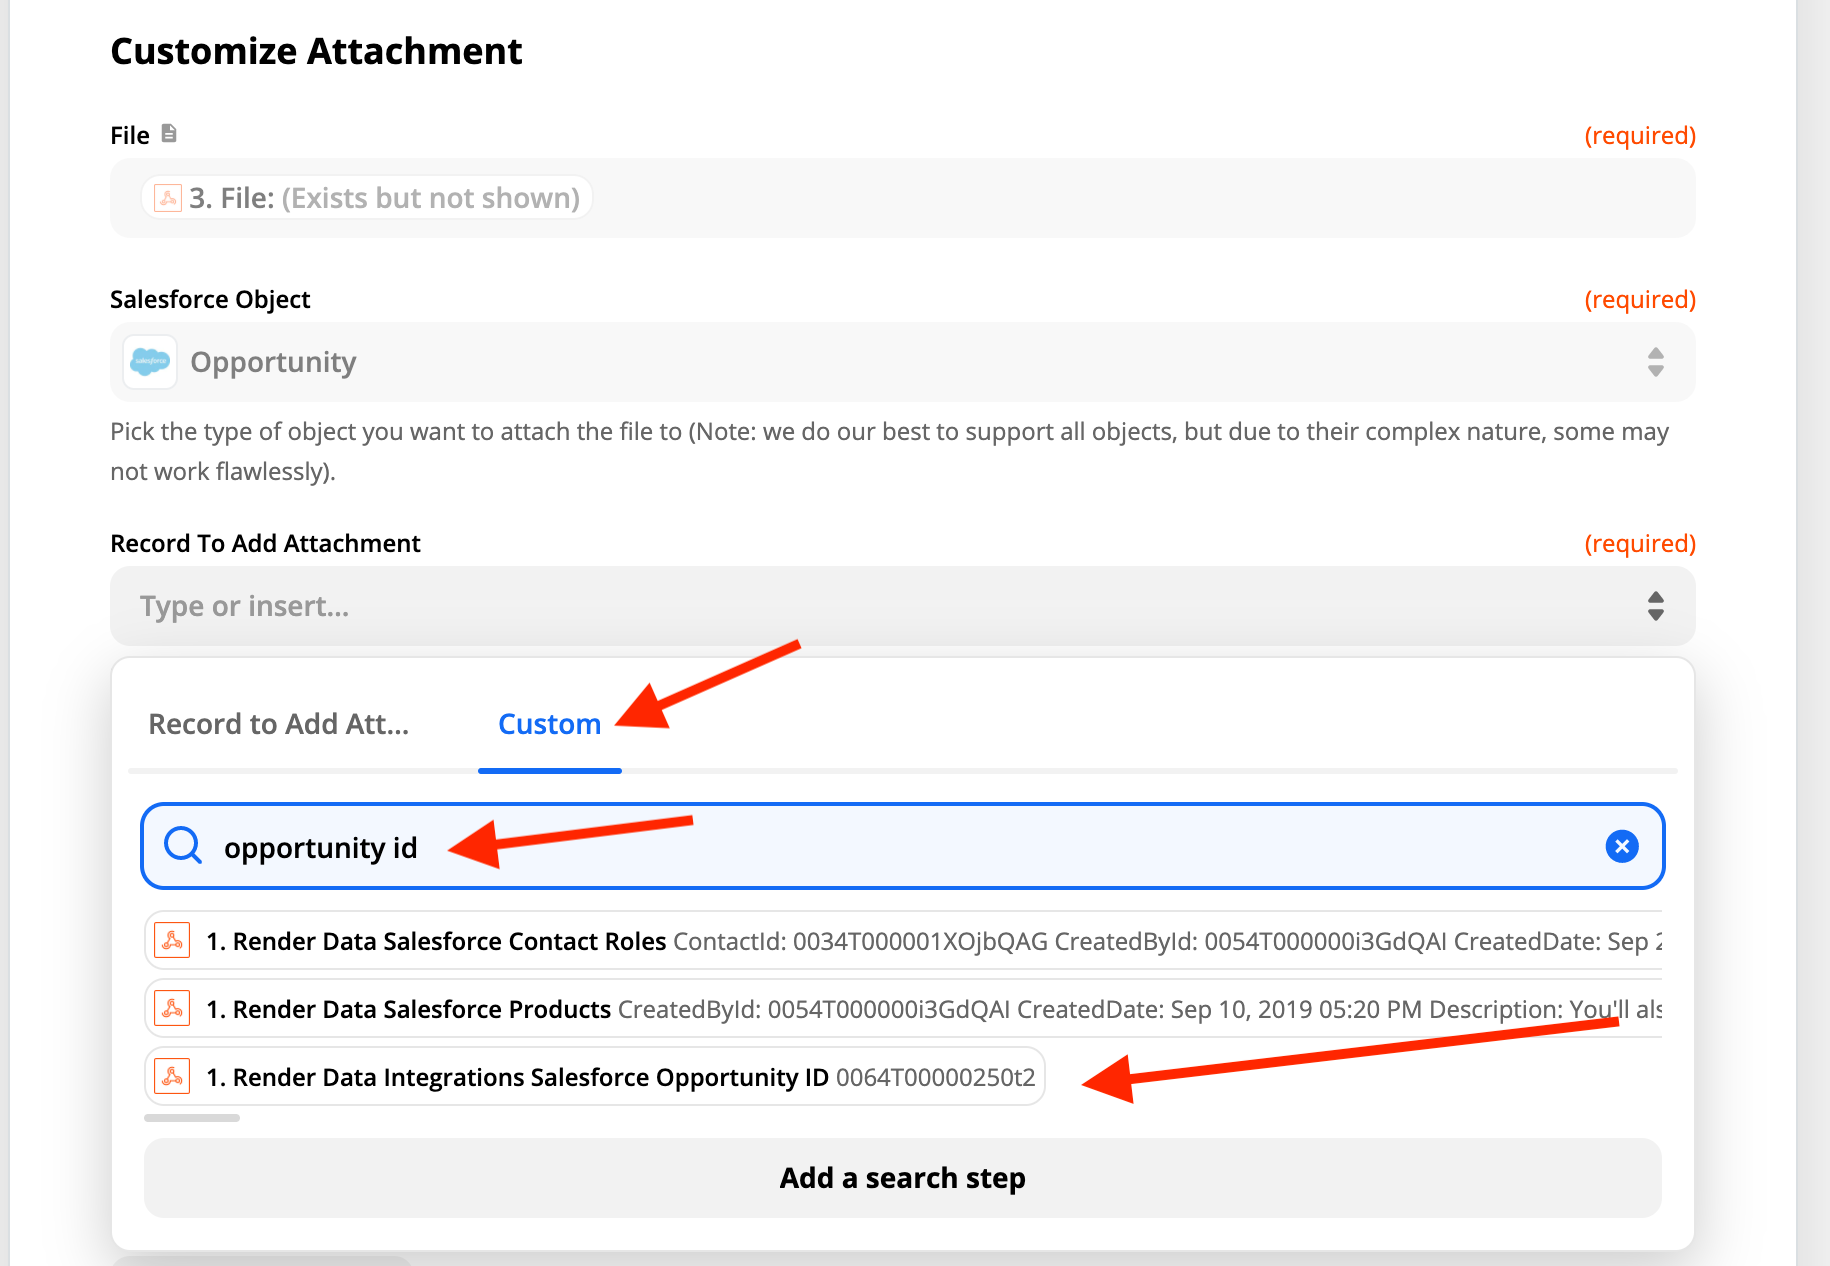
Select Opportunity and Use Opportunity ID
Lastly, you'll need to select the Object you want to attach the PDF to. In this example, since we are sending contracts from Salesforce using PactSafe, we want to attach the completed record to the opportunity we sent from. We can do this by:
- Selecting the Salesforce Object as Opportunity
- Change the Record to Add Attachment as Custom
- Search for
opportunity idand select it from the render_data
Render Data and Opportunity IDThis example will only work for contracts send with PactSafe for Salesforce. If you need to send to Salesforce without having sent from the PactSafe for Salesforce app, you'll instead need to add a prior Salesforce Zapier step that looks for a record (in Salesforce) and which can return an ID used for this step.
Turn Zap On!
That's it! You should be done once you test and turn on.
Updated 3 months ago
