How to Add a Clickwrap Group into a Marketo Form
This step-by-step guide will teach you how to integrate Clickwrap tracking into your Marketo Form.
Step 1: Configure template(s) and Clickwrap Group
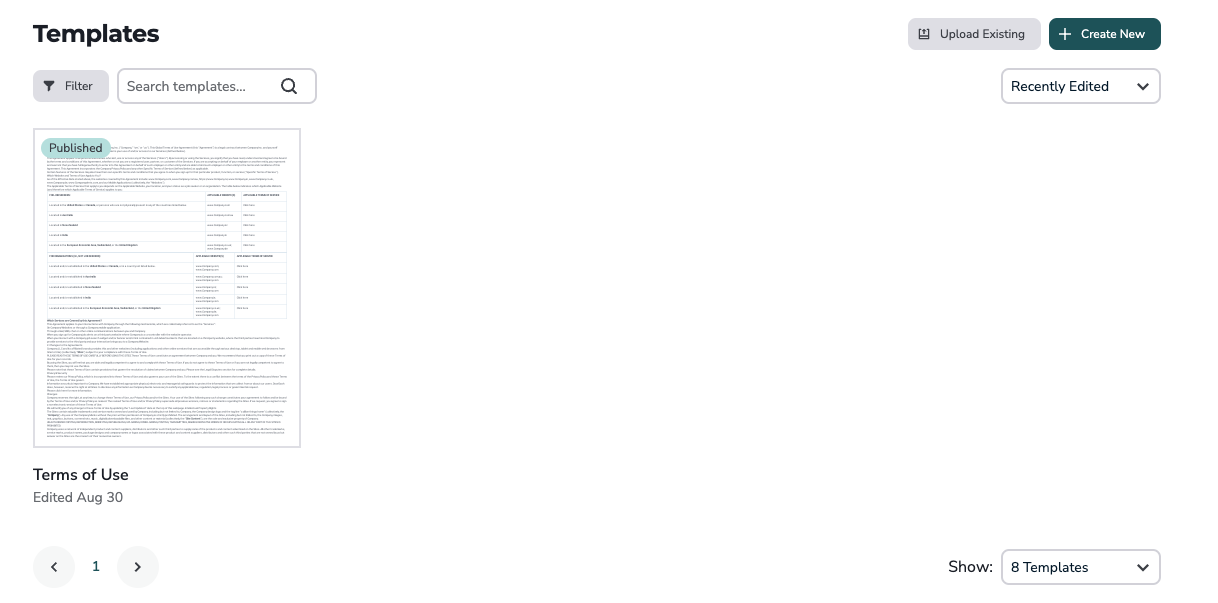
Sign up for an Ironclad account to start tracking clickwrap acceptances. Let's navigate to the template tab to add a Terms of Use agreement. Select "Create New" to start a new template.
Name your template “Terms of Use” then drag and drop a .docx file of your template. Select "Save" and then press "Publish".

A Clickwrap Group is a "container" for your contracts - they can contain one, or many contracts that you want to display to an end user. For example, you can pair privacy policy and terms of use together in a Group and track acceptances for both in the same flow.
To create a group, navigate to the "Clickwraps" tab. Click on the "Create Clickwrap" and then give your group a name like "MarketoForm" on the top left.
Under the templates section, pick the Terms of Use. Press "next" on the top right to configure how the clickwrap will be displayed.
Under presentation options, you will be able to preview the different styles available for clickwrap. Select the style you'd like the clickwrap presented in.

After selecting the presentation, adjust the acceptance language to be displayed.
I understand and agree to the following {{contracts}}.The placeholder {{contracts}} will be replaced with the actual Template titles. After you are finished, press "Publish".
Step 3: Set up Configuration Snippet
Loading clickwrap agreements to your webpage is as simple as copying and pasting a few lines of code.
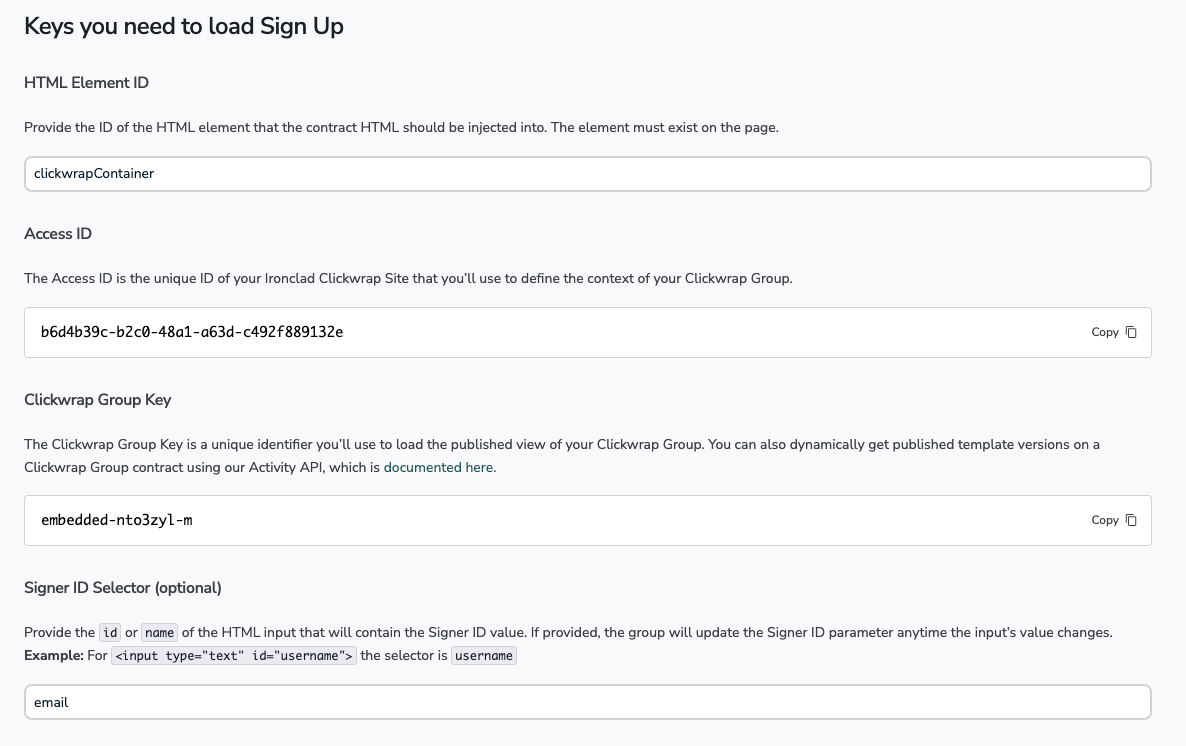
Navigate to "Clickwraps" in the main tabs. Then select "MarketoForm" clickwrap group and click on the "embed" tab to grab the required code.
To speed up the setup, IDs can be prepopulated into the snippet. The first input is the HTML Element ID where the contract HTML should be injected to. Fill in "clickwrapContainer" in the first box.
The second input is the Signer ID Selector, typically the email or username HTML field ID. Fill in "email" into the box.

These two inputs will automatically be populated into the required code to be pasted into the webpage. Copy the code snippet under "Loading the Clickwrap Group" and paste the code into your header or script section.
Step 4: Optional Form Validation
For many acceptance scenarios, our customers like to ensure their users are accepting the contracts prior to moving on and submitting the form. Here is a simple function that uses methods available on the _ps function and associated Site and ClickwrapGroup objects to check the acceptance status of Contracts on a specific ClickwrapGroup.
function contractsAgreed(gKey) {
  // Check to ensure PactSafe Object exists.
  if (!_ps) return false;

  // Check to ensure the Site object exists.
  if (!_ps.site) return false;

  // Check to see if a Group exists by a key.
  if (_ps.site.getByKey(gKey)) {
    var clickwrapGroup = _ps.site.getByKey(gKey);

    // We'll use the .block() method since we are
    // using automatic event sending with the JS Library.
    var shouldBlockSubmission = clickwrapGroup.block();

    // If the .block() method is true, we should prevent the submission
    // as all contracts within the Group have not been accepted.
    return !shouldBlockSubmission;
  }
}
A
blockmethod available on a ClickwrapGroup object tells us whether or not to block the form submission. You can optionally choose to utilize another methodallCheckedin the case you may be sending acceptance manually and would prefer to check that the checkboxes are checked.
Step 5: Loading Clickwrap on to Your Marketo Form
The MktoForms2 object has a whenReady method that is useful for doing additional configuration once the form has been initialized and is ready. Please refer to Marketo's docs for more information on their methods.
// Handle clickwrap loading
MktoForms2.whenReady(function(form) {
  // Load the Group with options.
  var groupKey = 'example-web-group';
  _ps('load', groupKey, {
    container_selector: 'contracts-container', // Empty div inside form.
    display_all: true, // True causes the Clickwrap to always show.
    signer_id_selector: 'Email' // ID of email input field.
  });

  form.onValidate(function() {
    var agreementsAgreed = contractsAgreed(groupKey);

    // Check to see if the Clickwrap contracts have been accepted.
    if (agreementsAgreed) {
      form.submittable(true);
    } else {
      alert('Please review and accept the agreements.');
      form.submittable(false);
    }
  });
});
Loading the Group
Within the whenReady method, you can then load the ClickwrapGroup Object with the Group Key you've configured within the web app.
Validating Acceptance
Marketo also offers an onValidate method that can be used on the Form object. Within here, you can utilize the helper function contractsAgreed we previously created to determine whether or not to allow the form to be submittable.
In this scenario, unless the user has agreed to the contracts AND acceptance has been sent to the API, we will prevent the form from being submittable and show an error message asking them to accept the agreements.
Refer to Marketo's docs on how to appropriately show a form error message as using the Window Alert method is typically not ideal.
Updated 5 months ago
